This is an easy to make bento lunch recipe!! And it looks adorable if you love Benito's!!!

Ingredients:

Sticky rice

Sesame seeds

Salad supreme seasoning

Tuna

Mayo

Directions:

Make yourself some tuna! Add a little less mayo than normal. You don't want it to be to wet, otherwise the rice will absorb it and loose some of its sticky.

Cook your sticky rice any way you prefer! It doesn't have to be special for this recipe! In fact I used microwaveable sticky rice for convenience.

Once your sticky rice is cooked, lay out a spoonful onto a sheet of cling wrap. Fold the cling wrap over the rice and shape into a ball. It's best to do this while the rice is still hot. Be carful not to burn yourself!

Once the rice is rolled into a ball, use your thumb to make a depression into the center of your rice ball.

Next fill up that depression with your tuna.

Cover the ball with the cling wrap again and start working the rice around it back into a ball until it's completely covered again.

Now in a small seperate bowl, add about two table spoons sesame seeds. sprinkle about a half tablespoon of the salad supreme seasoning and mix together.

Drop your rice ball in tr bowl and rotate until covered!

Add to your bento box, add some decorations, and voila! A perfectly pretty delicious treat for a bento box!!

*** great bonus fact! If you like the idea of bento boxes I totally recommend them. The sizes are based on your age and height, in a way to give you the appropriate amount of calories! I use mine to help with a portion control issue and I've lost weight effortlessly!!! ***

ENJOY!


Tonight, I give you my famous buffalo chicken dip, with a twist! And ya know what? It was flippin' fabulous! It's a perfect finger food, and it was less messy than a typical dip!

Ingredients:

      2 (10 ounce) cans chunk chicken,        drained

*** you can also used 2 boneless, skinless chicken breast for this recipe boiled and shredded ***

2 (8 ounce) packages cream cheese, softened

1 cup Ranch dressing

1 cup franks buffalo sauce

1 cups shredded Cheddar cheese

1 package of wonton wrappers

Directions:

In a medium sauce pan add both cans of chunk chicken and franks buffalo sauce. Bring to a simmer and stir. The chicken will start to shred apart by itself. let this simmer on low for 5 minutes. This is my secret! I think the simmering just really gives it that nice kick!

Raise the heat back to medium, add the two packages of cream cheese (My advice it to do this one at a time until melted). stir well until combined.

Next add the 3/4 cup ranch dressing (you can do blue cheese but I prefer the ranch). Mix well. Then add the shredded cheese. Mix until melted.

This is your dip! If you don't want to do rangoons you can now just transfer it to a casserole dish, add a bit more shredded cheese to the top and bake @ 350 until it just starts to bubble ( about 15 minutes).

For the ragoons:

Pre-heat your oven to 425F. Use a cooking spray and spray down a few cookie sheets. (I really recommend the air bake cookie sheets! Nothing burns!!).

Grab a small bowm and fill it with water. You'll be dipping your fingers in the water to seal your rangoon up!

Also take a small plate and grease that with your baking spray as well, it will help to prevent any rips in your wonton wrapper!

Place one wonton wrapper on the greased plate. Take a spoon and drop a nickel sized portion of dip into the center of the wrapper.

Next take your two index fingers and dip them in the water. Run them along the edges of your wrapper.

Now take one corner of the wrapper and fold it over to the opposite corner. Re-dip your fingers in the water and run along the two open edges to seal in the dip. Make sure it is sealed!

Now you can leave them like this and place them on your greased cookie sheet, or you can get fancy and do what I did by grabbing the two edges of the bottom of your triangle and pulling them down until the join together. Seal it up with some water and pinch!

Now I recommend preparing all your cookie sheets in one go! DO NOT WAIT UNTIL ONE IS IN TO START YOUR NEXT TRAY!

In time your will get faster, but for now take it slow. It doesn't take that long to cook these. Think ahead!

Now that you have all your rangoons ready to go, give them all a quick spray of your baking spray! Go ahead and stick them in the oven, middle rack. For about 5-8 minutes. Keep an eye on them. Once they start to turn brown they're done!

Serve on a plate with either some blue cheese or ranch dressings for dipping, and a few pieces of celery don't hurt either, if your like me and like things hot!


Let me tell you I was skeptical about this one. I am not the biggest fan of no bakes because sometimes the consistency can turn out slimey, and that's gross!

This is a different story, despite the gunk you poor into this recipe, it's super yummy. And while in the future I will be trying this with chocolate wafers instead it was really a winner!

Here's what you need!

1 13x9" casserole dish

1 20oz can crushed pineapple

1 can sweetened condensed milk

1 box of nilla wafers

1 container of cool whip

1 bag of coconut

1 jar of cherries

1/4 cup lemon juice

Directions:

1) layer the bottom of your dish with nilla wafers (It should take about 1/2 the box, save the other half for later), you want them to cover the bottom of your dish completely.

2) in a medium mixing bowl, mix together the 20oz can of crushed pineapple, can of condensed milk, and 1/4 cup of lemon juice. Mix until combined well.

3) pour over your layers of nilla wafers. SLOWLY!!! Your nilla wafers tend to migrate with this step. After you pour it all on just take a knife and move the ones that went on an adventure back to the bottom of the pan.

4) add on a second layer of nilla wafers. It should be the rest of the box at this point.

4) now take that container of whip cream and mix it real well in a warm bowl( I just run my bowl under warm water and dry it). I find it's easier to spread afterwards if you follow that step. Spread the cool whip over the nilla wafers.

5) sprinkle on the coconut until you can't see the whip cream anymore. *if you don't like coconut as much as I do, you can try this with chocolate shavings and I'm sure it would be great!*

6) take your jar of maraschino cherries and place them almost as polka dots in a line. This gives it a nice geometric presentation! And they're yummy!

7) refrigerate this over night of for several hours (at least 6), serve and enjoy!


So this Pinterest attempt looked easy enough, and fortunately it was! And if I had some sort of offspring, other than my hell spawn cat, I'd bet they'd be really flippin' excited. Good thing I'm a giant 6 year old anyways.

First things first. You do not want to make a whole box of pasta at a time. So this is great if your trying to for portion control (which I completely lack when it comes to pasta!) split the box in half. It's easy enough to make and quick so splitting the box in half isn't an earth shattering annoyance. I promise.

Here's what you'll need:

1 cucumber (peeled)

A carton of cherry tomatoes

Small yellow onion diced

Supreme salad seasoning

Italian dressing (I like the ken's with the aged Romano in it for a more flavorful taste)

6 ziplock bags

Fun food coloring (I used the neon pack and the regular pack for a nice assortment)

Water

1) pull out a pot and fill it a little over a half way with water. Add salt to taste and bring to a boil.

2) while your water is attempting to boil. Put 20 drops of food coloring into each ziplock bag. Followed by 2 tbs of water. Make sure you seal those bags up! They tend to roll and I'm not kidding you, it will look like a piñata blew up in your kitchen. For food coloring I used all of the colors in the neon pack, purple, teal, green, and pink. I added the red and the true green from the regular pack.

3) once your water is boiled, add your pasta and follow directions to cook al dente. ( I don't like al dente pasta, so I cooked it where it was just past this but not fully cooked)

4) once the pasta is cooked to al dente throw pasta into a colander and rinse with cold water! This stops the pasta from cooking! Add more water to your pot! Put back on your stove too reduce heat to medium. Water needs to be warm but not boiling!

5) now that your pasta has been run under the cold water, start portioning out the pasta equally into the different ziplock bags and mix in the bag until the pasta and colors are fully combined. Try not to get too excited here like I did! You want to let this sit for a few minutes!

6) now that your pasta has set in the bags for a minute or so, empty the bags out into the colander. rinse with cold water until clear.

** my advice to you is to do one bag at a time. The recipe on Pinterest says to empty them all into your strainer at once but the colors bleed onto each other and you start to get weird looking pasta instead of nice bright colors! **

7) once all the extra color has been rinsed off the pasta, add back to you pot of warm water for a minute or so to fully cook the pasta. (In here the green dye that was in the neon package will turn a nice yellow, hense the true green)

8) drain pasta, add enough salad dressing to wet the pasta but not to pool at the bottom (you can always add more later) and put Ito te fridge to chill.

9) halve the cherry tomatoes and slice a peeled cucumber into thick slices, then quarter the slices. Dice a yellow onion (you probably only want about 1/8 of a cup for a half lbs of pasta)

10) add veggies to your pasta. This is when you want to add in your salad supreme seasoning. Add to taste. I usually add it until you can see the little orange dots in the seasoning cover the pasta after you've mixed it (about 2 tbs for a full box) I understand this direction is super scientific, you'll understand when you start adding the seasoning!

11) chill and serve!


Looking for something quick, healthy, and refreshing to use as a side dish to your moderately *unhealthy* dinner of um... Let's say, bacon wrapped Polish Kalbasa with maple baked beans?

Well you've landed yourself in the right place! I'm sorry if this is out there on the interwebs somewhere(I mean everything is on the internet by now right?). It's something I threw together from the ingredients I had in house, and I liked so much, I'm sharing it!

Ingredients:

Distilled white vinegar

1 cucumber

A handful of cherry tomatoes

Salt

Pepper

Directions:

Peel the cucumber and cut into thick 1/2" slices. Then quarter the slices. Add to a medium sized bowl. Next quarter your cherry tomatoes. If they're of the small variety, just halve them. Add them to the mixing bowl. Take 3 capfuls of the vinegar and pour it over the top. Add fresh ground pepper and sea salt to taste. Mix and enjoy!


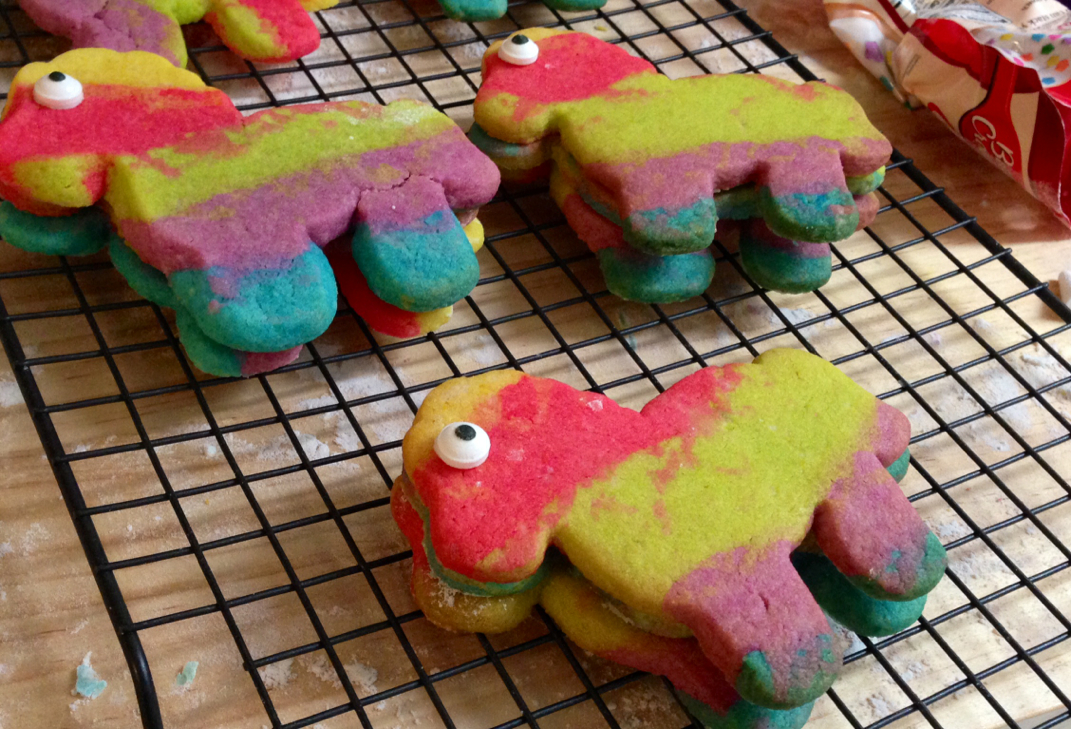
Or should I say fat llama cookie, because that's exactly what they ended up being.

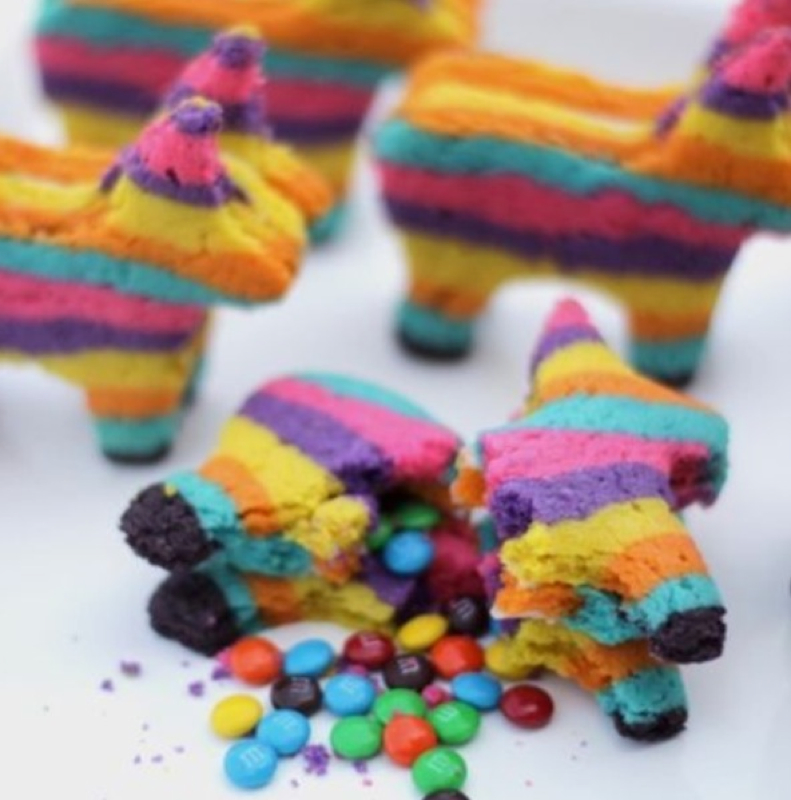
Here's the deal with this cookie, they look cute, but they will never ever be as much fun as this picture leads one to believe.

I'm not going to lie. I was sucked into this cookie idea from the moment I saw it, and I knew I needed to try this one! I mean, it's a piñata cookie with magical candy fiilings!

So here's how I attempted this cookie.

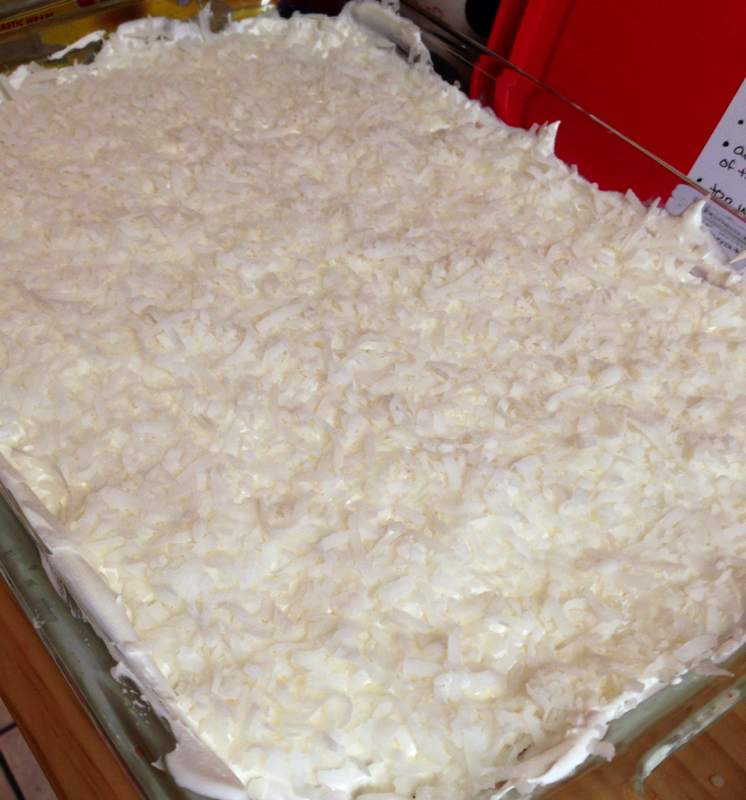
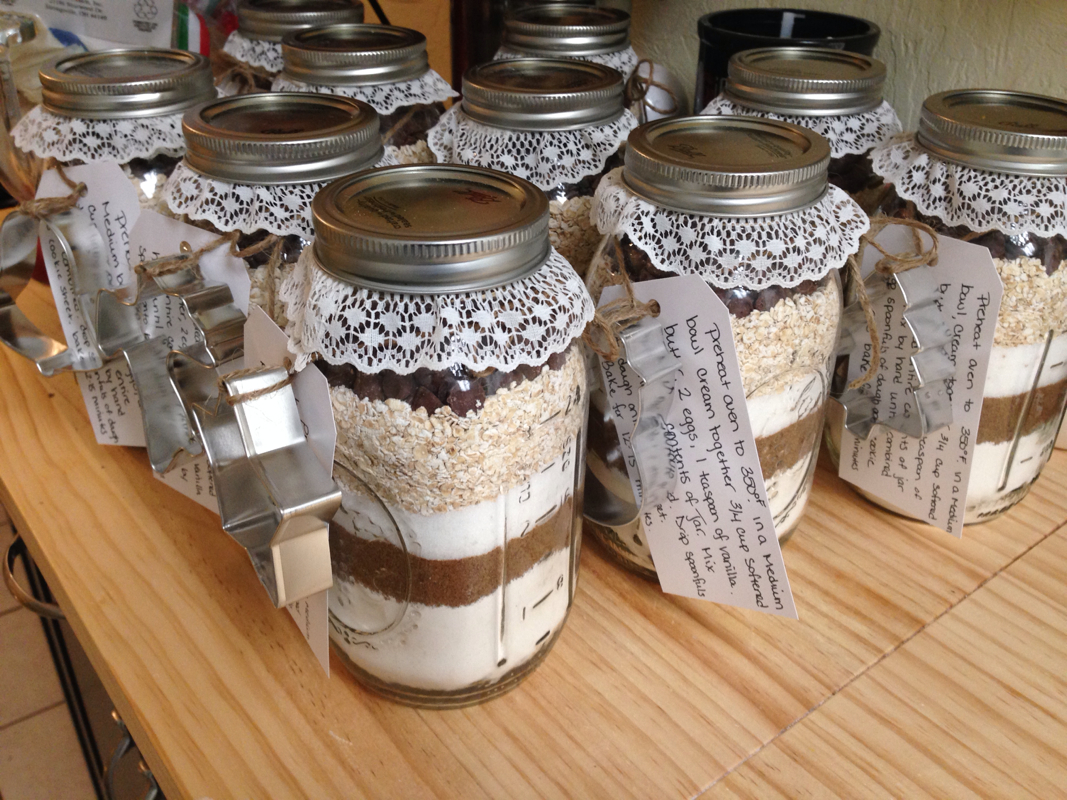
Part of the Pinterest post shows then layering this in a long Tupperware lined with cling wrap.

I'm not going to lie. This bastard needs a lot of dough to complete. And I cheated. I bought 4 packages of the Betty Crocker sugar cookie dough (as far as cut out cookies go, it's very reliable). Each bag is supposed to make 3 dozen cookies. Now unless this is 3 dozen quarter sized sugar cookies this is also a lie.

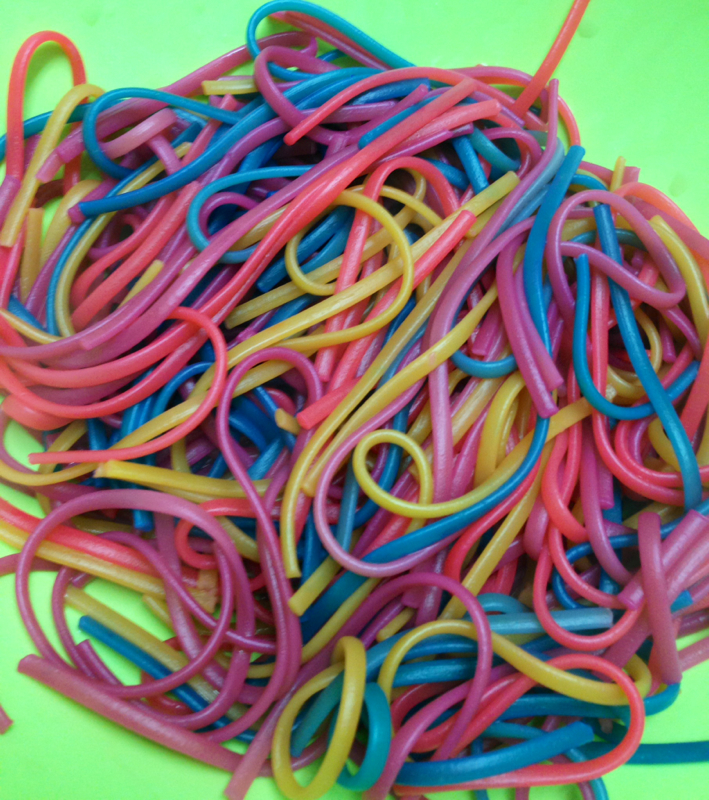
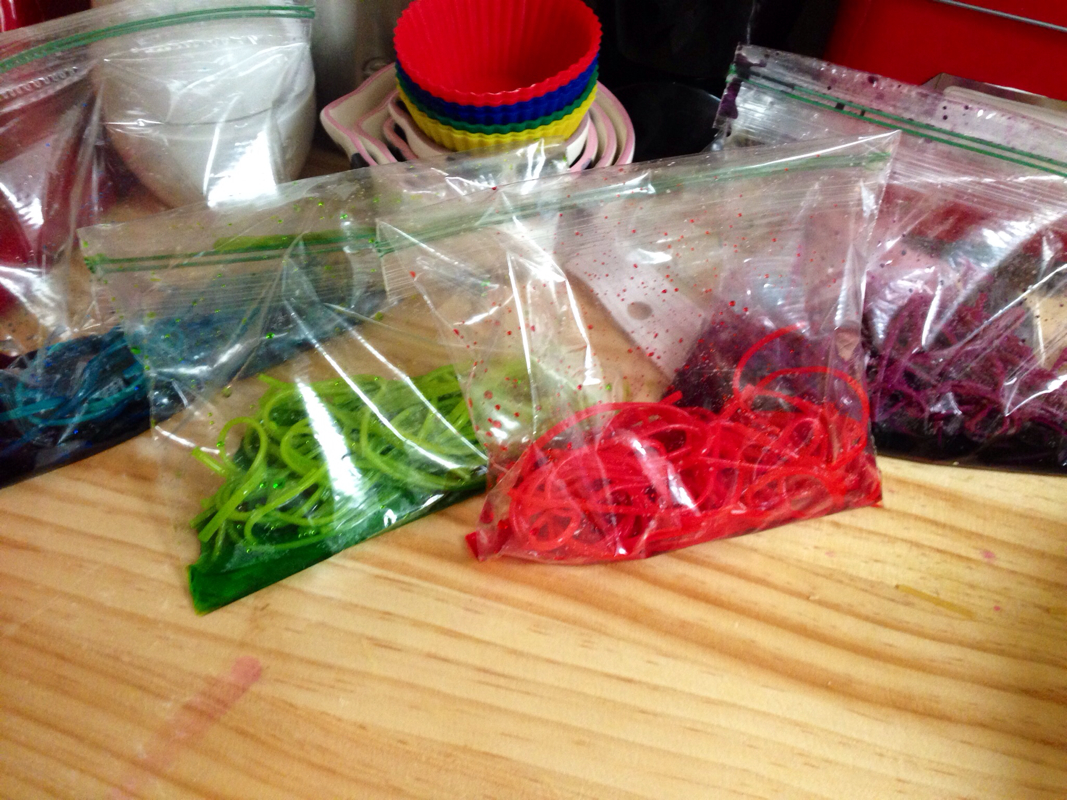
So I made all four bags of sugar cookie dough, split them into 6 large balls of dough, and dyed then with neon food coloring. (Pink, teal, green, and purple) I also did red and yellow from the regular food dye packs.

I layered them all up in this Tupperware. Thing was like a sugar cookie meatloaf when it was done. A sugar cookie Godzilla if you will. It was HEAVY! Popped it in the fridge for a few hours and then went to town.

Now for anyone who bakes the key to a perfect sugar cookie is to get an even 1/8" cookie. You can not slice this sugar brick into such thin slices, it's to hard after being in the fridge. So you cut maybe a 1/2" slice and roll it out. Then you cut your shape out.

Now admittedly I tried to find a donkey cookie cutter EVERYWHERE. Including amazon, and when I received my package in the mail my donkey was hilariously only 1/2" tall. Needless to say, I ended up with a horse cutter.

I cut out three horses per cookie. On horse facing the right, one facing the left(this is extremely important, or you will have one funky looking side!), and one horse where I mutilated it's body by cutting off the legs, and it's inner stomach. This is what holds the mini m&m's.

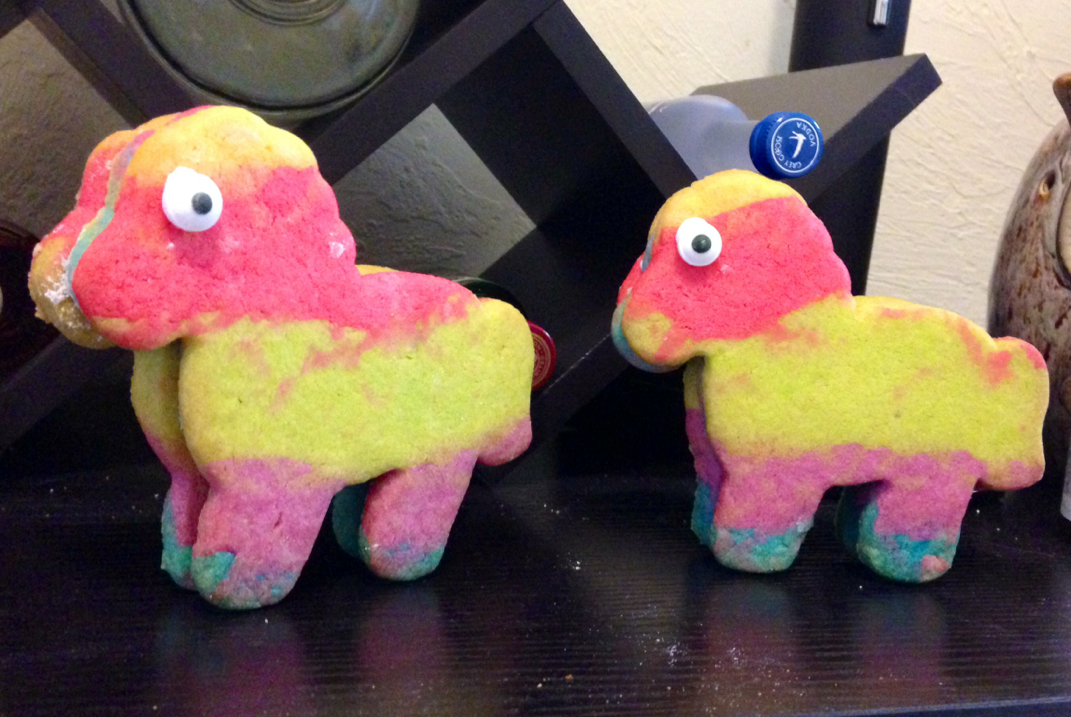
Following the directions on the sugar cookie package I baked them for the appropriate amount of time. After pulling them out I notice instead of nice looking horses they were bloated llamas. Whatever... I like llamas. Trying to make the best of the situations I went to town on frosting the mutiliated pony in top of a whole pony. Once assembled fill the now divot in the ponies with the mini m&m's.

After that's done add the other whole horse.

And voila! Now I added sugar Googly eyes to them, for my own pleasure. Because I just thought they looked hysterical with eyes.

Now my husband loved them, but they're cookies. Cookie always taste good! What irked me was the presentation. I wanted cute little piñatas and what I got was fat bloated llamas.

I guess it's still a Pinterest pass. But they could be improved. Here's a list of what the recipe doesn't tell you but you should now.

1) you don't need a whole casserole sized Tupperware filled with cookie dough. like the Pinterest post shoes! I froze over half of mine! Cut it down to those square tupperwares and layer it up.

2) you don't need to fill that Tupperware up to the height of your cookie cutter! Because most likely you won't be getting that perfect 1/8" slice. Save yourself some time and money and just fill half way. You'll be using a rolling pin anyways. And typically you'll get two shapes out of one slice

3) adding eyes totally makes these better!

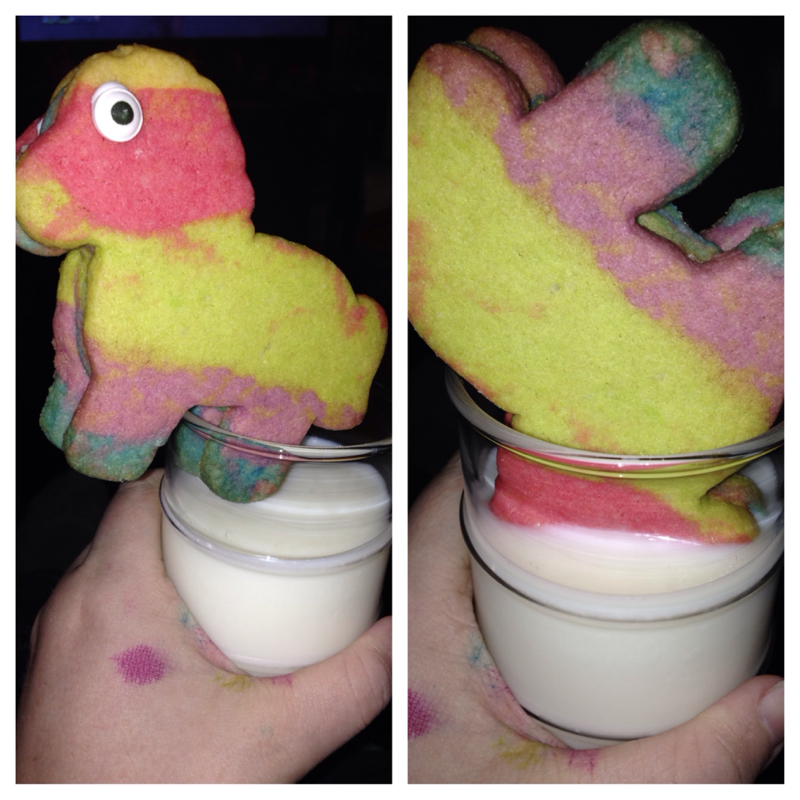
4) the pictures on Pinterest is misleading. This is in fact no way you can fit that many mini m&m's in there. At the most maybe 8 mini pieces. That's it. Totally not as much fun as they looked.

5) the middles slice does not need to be pretty. no one is going to see it! Use all the left over dough from the whole horses and roll it out and use that for your middle slice. COST EFFICTVENESS HERE!!

On the bright side they stand up on their own 4 legs!


Ingredients

  • 3/4 cup white sugar
  • 3/4 cup packed brown sugar
  • 1 cup rolled oats
  • 1 1/2 cups all-purpose flour

1 1/2 teaspoons baking powder

1/2 teaspoon salt

1 cup semisweet chocolate chips

Directions

Preheat oven to 350 degrees F (175 degrees C). In a medium bowl, cream together 3/4 cup of softened butter, with 2 eggs and 1 teaspoon of vanilla. Add the entire contents of the jar, and mix by hand until combined. Drop dough by heaping spoonfuls onto an unprepared cookie sheet. Bake for 12 to 15 minutes in the preheated oven.

Let me tell you that these are delicious! And they went fast too! I actually layered the dry ingredients into mason jars and gave then as Christmas gifts this year!

If you want to layer them my advice to you is to layer it in this order:

1) Flour baking powder and salt mix

2) brown sugar

3) white sugar

4) oats

5) chocolate chips

With practice you can you can fit all the ingredients in the jar. Make sure you use a 1 liter mason jar! I recommend using a nice cream scoop to pack down all the ingredients!

For the gift look, you can buy vintage blue jars on etsy, but I bought clear ones at walmart and thought all the ingredients layered well. I added the instructions on an oversized gift tag I found at A.C. Moore, paired it with a stainless steel holiday cookie cutter (not practical but it looked adorable) and wrapped it all up in a twine bow!

    About Nikki

    Just a girl who likes to bake and cook! Over the next year I'll be experimenting with my own recipes, Pintrest recipes, and finding uses for a $25 penis shaped cake pan I Mistakenly bought once..

    "I’ll be a story in your head, but that’s okay, because we’re all stories in the end. Just make it a good one, eh?"

    Past Recipes

    January 2014